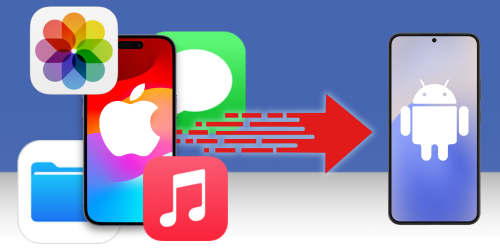
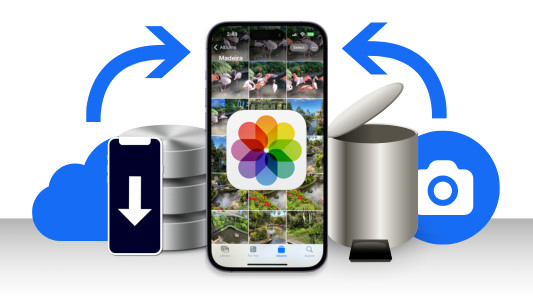
Introduction
If you're switching from your old iPhone to Android (the most popular mobile system in the world), you'll want to take all of your data with you - especially your photo library which may contain countless precious memories.
There are loads of different ways to do this, so we've reviewed and tested numerous methods for you, and have compiled a list of the best ways to transfer photos from iPhone to Android for this guide.
Quick jump to any of the methods reviewed:
- Transferring from iPhone to Android using specific manufacturer apps
- Transfer photos and more from iPhone to computer the smart way
- Drag and Drop photos using USB cables & your computer
- Share photos between iPhone and Android using cloud services
- 4.1 Google Photos
- 4.2 Google One
- 4.3 Google Drive
- 4.4 iCloud
- Send photos from iPhone to Android via Messaging or Email
1. Transferring from iPhone to Android using specific manufacturer apps
Android devices come in all shapes and sizes from manufacturers like Samsung, Google, Xiaomi and Huawei. Many of these manufacturers supply an app for use with their devices to help users transfer data from their old device to their new device. Note that some of these apps only work when setting up a new Android device, so you may not be able to transfer bits and bobs after the device has already been set up.
If using a manufacturer app, ensure that it will transfer your photos, as well as any other data you want to take with you from your iPhone. To safely save all your iPhone content to your computer first, we recommend using TouchCopy. Let's take a look at a couple of manufacturer transfer apps below:
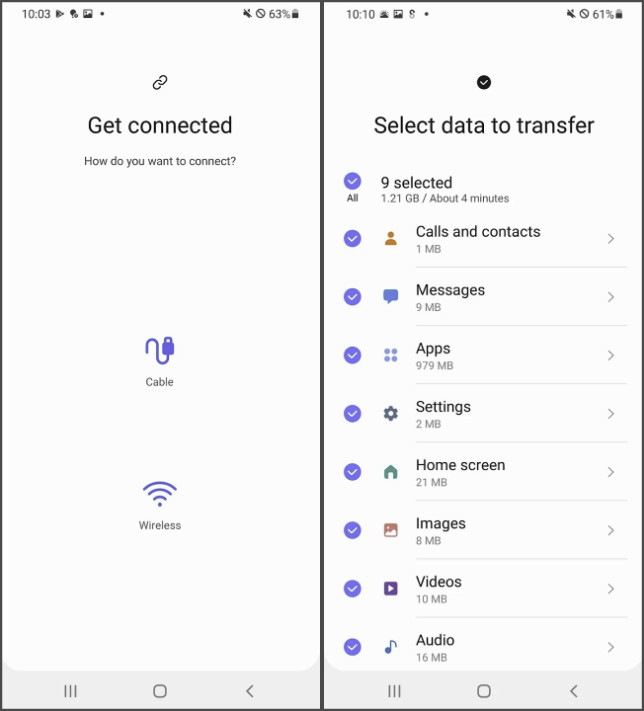
1.1 Samsung Smart Switch
Samsung have created their 'Smart Switch' app which allows users to easily copy content from their old device to their new Samsung Galaxy device (this only works for Samsung Galaxy devices, and Smart Switch is usually preinstalled on newer Galaxy models).
With Smart Switch, you can transfer data from iPhone to Samsung Galaxy directly via USB cable or Wi-Fi, or restore an iPhone backup from your computer to the Galaxy. You'll have the choice to transfer everything, or select content like Images, Videos, Audio, Messages...
Check out Samsung's page for more information about how to transfer data from iPhone to Samsung Galaxy with Smart Switch.
1.2 Huawei Phone Clone
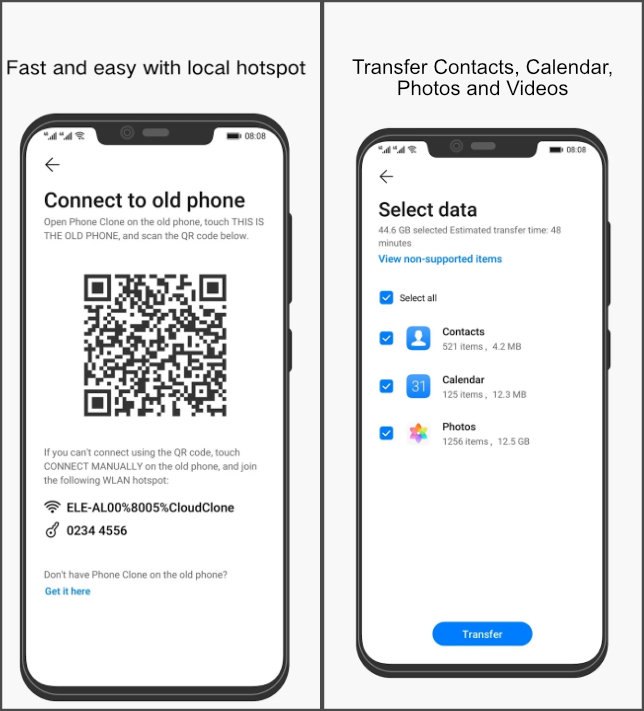
If you're switching from iPhone to a Huawei phone, you can use the Phone Clone app by Huawei.
This app works very similarly to Smart Switch above; however, it only has the option to connect the devices by Wi-Fi. Additionally, this method requires you to install the Phone Clone app on both your iPhone and your Huawei Android phone (the app may come pre-installed on the Huawei device).
Phone Clone can only transfer Contacts, Photos, Videos, Calendar from iPhone to Huawei - so make sure you back up your other iPhone content if you want to keep it!
During the Phone Clone setup in the app, you can choose to allow access to only the photos you want Phone Clone to transfer, or allow access to all. Transferring photos in this way will not overwrite any images already on your Huawei device.
Summary (Manufacturer apps):
✔ Free and easy data migration
✔ Multiple connection methods
✔ Supports numerous content types
✔ Fast & Efficient
✘ Difficult or impossible to select specific files to transfer
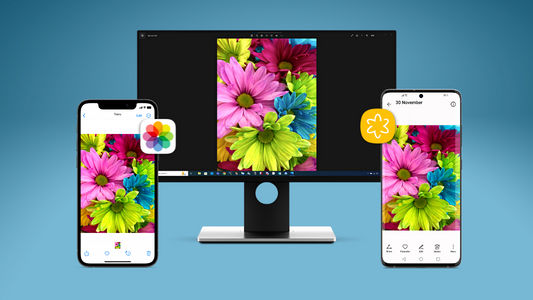
2. Transfer iPhone photos and more from iPhone to PC the smart way
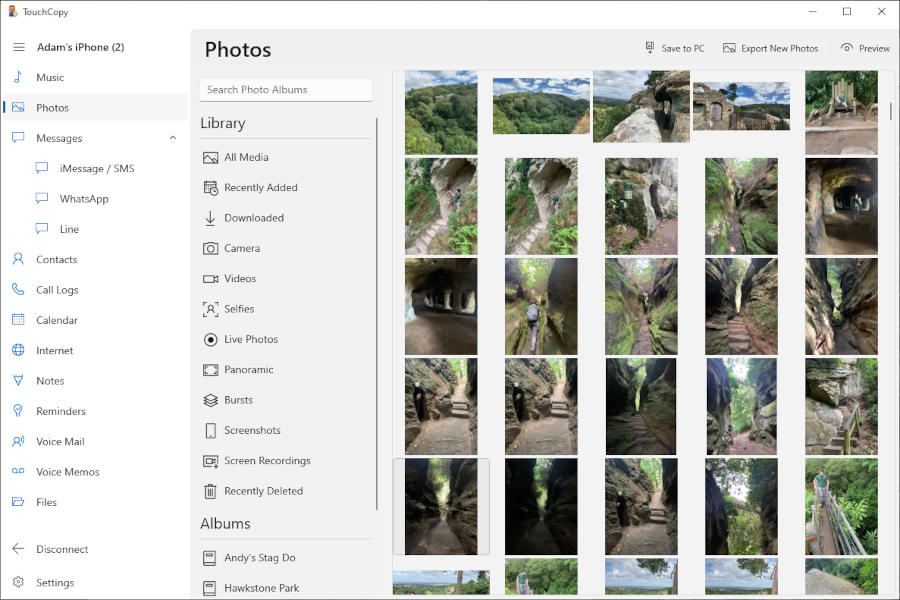
To take total control over exactly what photos you wish to transfer, we would recommend using TouchCopy. You can view all the photos on your iPhone from your computer, then choose to transfer them all, or select only certain photos to transfer!
TouchCopy is a fantastic tool which allows you to access all your iPhone content from your computer. You can then selectively pick whatever iPhone content you want to save to your computer for easy access (we'll also cover how to then transfer photos from computer to Android). TouchCopy can not only save Photos, but also Messages, Contacts, Call Logs, Music and more!
We've also tested alternative ways to transfer photos from phone to computer, so to copy photos from iPhone or Android to your computer, check it out!
Let's take a look at how to save iPhone photos to computer using TouchCopy:
- Download and install TouchCopy on your PC or Mac.
- Launch TouchCopy and connect your iPhone to your computer using your USB cable.
- Select the Photos feature to view all the photos and videos on your iPhone.
- Choose the photos you wish to save to your computer. To select multiple photos, hold ctrl (PC) or cmd (Mac) while clicking your chosen photos. To select all photos, use ctrl+A on PC, or cmd+A on Mac.
- Click "Save to PC" or "Copy to Mac".
- Choose the location on your computer to save the selected photos to, and save!
Transferring photos from computer to Android:
Once your iPhone photos are saved to your computer, you can then copy them onto your Android phone if you wish.
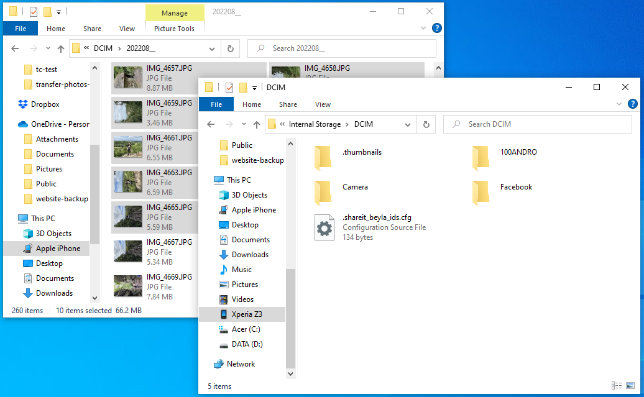
On Windows PC, open File Explorer and locate your saved iPhone photos. Select all the photos, then right-click > Copy. Next, connect your Android device, then select it in File Explorer. Here, navigate to the folder where your photos are stored (this can vary from device to device, but usually in a Media/Images/DCIM folder). You can then right-click > Paste your copied iPhone photos into the Android folder!
On Mac, the difference is that in order to connect your Android, you'll need to use the free Android File Transfer app. After installing the app, you'll be able to connect with your Android device and manage its files just like you saw in File Explorer above.
Summary (TouchCopy):
✔ iPhone to PC or Mac transfer
✔ All-in-one iOS file management
✔ Supports numerous content types
✔ Fast & Efficient
✔ Free demo available
✔ Convenient for regular transfers
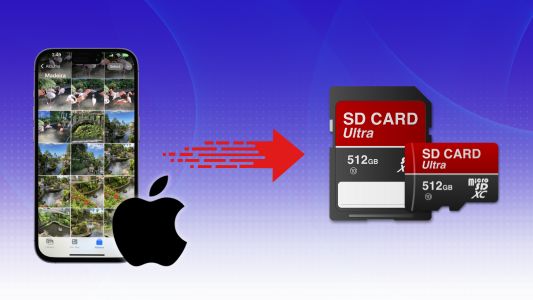
3. Drag and Drop photos using USB cables & your PC
Drag and Drop is perhaps the oldest and most common way to copy data from place to place.
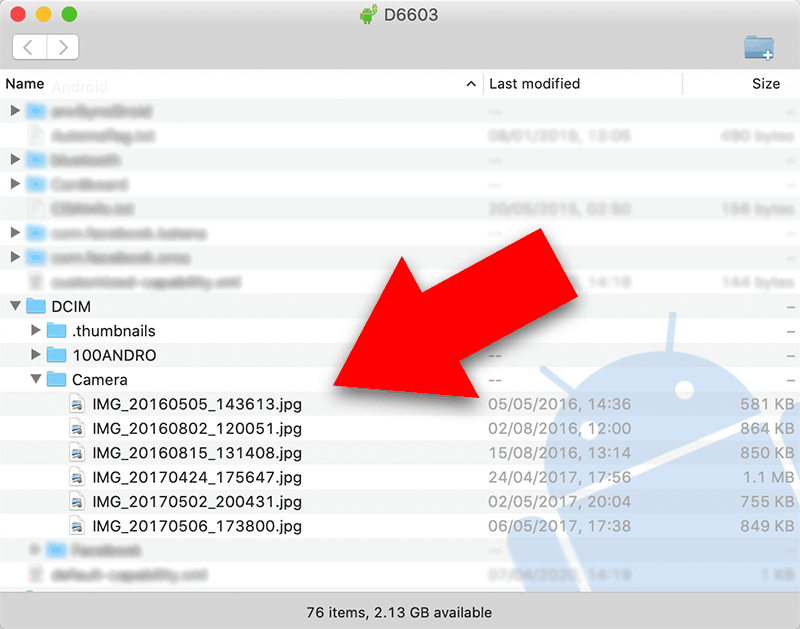
For a direct transfer, connect both your iPhone and your Android device to your PC using the relevant USB cables. In File Explorer, select your iPhone > Internal Storage > DCIM. Here you can select the photos you wish to transfer, then drag and drop them into a second File Explorer window showing the folder in which your Android photos are stored.
Some people report issues while trying this drag-and-drop method. If you have trouble, try dragging your iPhone photos to your Desktop first, then drag from the Desktop to the Android. Alternatively, you may prefer to use TouchCopy to more efficiently import photos and more from iPhone to PC.
Summary (Drag and Drop):
✔ USB wired transfer
✔ Computer required
✔ Quick & Easy
✔ Free
✘ Unreliable for some
4. Share photos between iPhone and Android using cloud services
For a more modern method of file transfer, you may wish to consider cloud services. There are many cloud services around, and they are a fantastic way of accessing your files from any device, wherever you are, as long as you're connected to the internet.
If you're not already aware of how this works, you are essentially storing your files on a server which you can access using the web. This can save storage space on your own devices, however if you run out of a cloud service's free storage, you'll need to pay a subscription if you want more space.
Let's take a look at how to transfer photos from iPhone to Android using some popular cloud solutions (Google Photos, Google One, Google Drive, iCloud).
4.1 Google Photos:
If you're switching from iPhone to Android, the Google ecosystem will become your new norm, as all the common apps come pre-installed on new Android devices. We'll cover 3 Google cloud platforms in this guide, each with its own pros and cons with transferring photos in mind.
You'll get 15GB of free storage shared between these apps, with an option to pay a subscription for more space.
If you simply want to transfer all your photos (and no other content) from iPhone to Android, it's most efficient to use Google Photos. When setting up Google Photos, you'll sync your entire iPhone photo library with the cloud automatically. Here's how it's done:
- Open the App Store on your iPhone and install the free Google Photos app.
- Launch Google Photos and sign into your Google account (ensure that this is the same Google account you'll be using on the Android device).
- Tap your profile photo (or initial) in the top-right of your screen.
- Tap 'Google Photos Settings' > 'Backup & sync' > toggle on 'Backup & sync'.
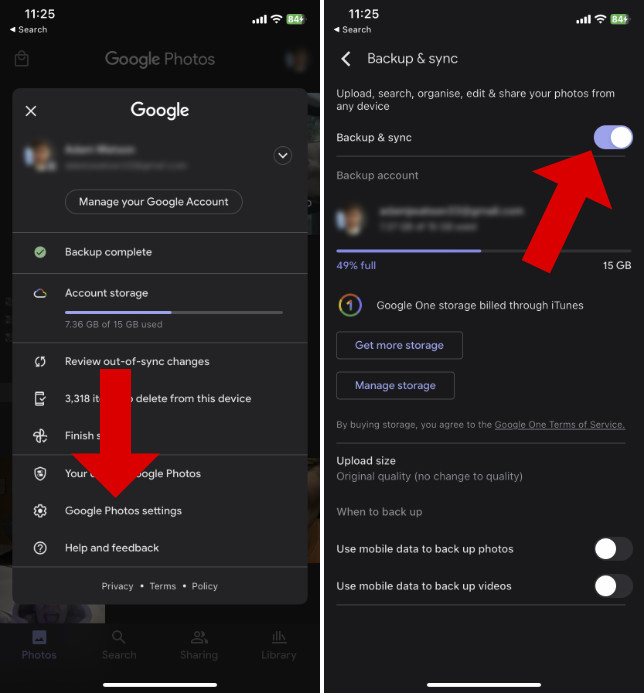
- Your iPhone will begin uploading all your photos to Google Photos.
- Once the upload is complete, grab your Android device and open Google Photos to access the new photos.
- If you want to download photos from Google Photos to your Android device itself, tap a photo, open the 3-dot menu, and tap 'Download'.
4.2 Switching from iPhone to Android using Google One
If you are looking for a more complete switch from an iPhone to a new Android, there's a better way than Google Photos above.
Using Google's new 'Google One' ecosystem, you can easily back up Photos & Videos as well as Contacts and Calendars, and access them on your new Android device.
Don't lose your other data! To save other content like Music, Messages, Call History, Notes and more, use TouchCopy.
- Get the free Google One app on your iPhone from the App Store.
- Launch Google One and sign into your Google account.
- Tap 'Set up data backup'.
- Select which iPhone data you'd like to back up to Google, then tap 'Backup up now'.

- Once the backup is complete, ensure that you are signed into the same Google account on your Android device, and the content from the iPhone will automatically populate your corresponding Android apps (Photos, Contacts, Calendar).
4.3 Google Drive:
Google Drive is the Google app which gives you the most control over exactly what you upload to your cloud space. Although for this reason, it can be very slow to select a large number of photos to upload, compared to automatically uploading a complete library of photos when using Google Photos or Google One.
Note that you'll also need to manually download the photos onto your Android device if you wish to store them in your Android photos app rather than leaving them in Google Drive.
- Go to the App Store on your iPhone and get the free Google Drive app.
- Launch Google Drive and sign into your Google account (ensure that this is the same Google account you'll be using on the Android device).
- Optional: If you want to keep all your new photos in a folder together, tap the '+' button and create a new folder. Then, navigate to your folder using the Files tab at the bottom of your screen.
- Tap the '+' button, then tap 'Upload' > 'Photos and Videos'.

- Choose to allow access to all your photos or only select ones.
- Select the photos you wish to transfer from iPhone to Android, then tap 'Upload'.
- Once the upload is complete, open Google Drive on your Android device.
- You can now access your new photos directly in Google Drive! If you wish to download the photos onto the Android itself, select them by tapping and holding a photo, then tap to select more photos you want to copy.
- When you're happy with your selection, tap the 3-dot menu, then hit 'Download'.
- The downloaded photos will be saved to your Downloads folder on your Android. If they are not automatically shown in your preferred photo-viewing app, use your file manager on Android to move them into your Images folder.
4.4 iCloud:
If you prefer iCloud, or already have your photos stored in iCloud, this could be the best option for you. You can't get an iCloud app on Android, but you can access your iCloud account and storage from your internet browser on Android! Here's how it's done:
- If you haven't already synced your iPhone photos with iCloud, on the iPhone, go to Settings > your username > iCloud > Photos > toggle on 'Sync this iPhone'.

- Once the syncing is finished, your photos will appear in iCloud, in full resolution.
- Now you can grab your Android device and open Google Chrome.
- Go to iCloud.com and sign in using your Apple details used on your iPhone.
- Go to the Photos section to view all your synced iPhone photos.
- If you wish to download the photos to your Android device, tap 'Select', then either 'Select All', or select the photos you want to save.
- Tap the 3-dot menu, then select 'Download'.
- Downloaded photos will be saved to the Downloads folder on your Android device.
Other
There are many, many more cloud services you can use to achieve the same results as the solutions above. A couple more popular ones of note are OneDrive and Dropbox.
If you want to use such a platform, you can do so in much the same way as Google/iCloud. Simply get the relevant app on both iPhone and Android, upload your iPhone photos, then access them on your Android device.
Summary (Cloud services):
✔ Wireless sharing
✔ No computer required
✔ Internet access required (Wi-Fi highly recommended)
✔ Free, unless more cloud storage required
✔ Automatic syncing between devices
5. Send photos from iPhone to Android via Messaging or Email
You can of course send photos to another device or contact using messaging services. Unfortunately, you may incur costs if you send photos as standard MMS messages, as such messages are usually not included in a mobile plan. However, you can send photos free using apps like WhatsApp and Facebook Messenger where messages are sent using an internet connection.
Sending messages in this way is limited twofold: You can only send a few photos at a time; and it may appear that the iPhone is sending blurry pictures to the Android, but this is a result of the images being compressed to meet messaging file size limits.
You can also send photos to yourself or another contact via email. This is certainly more convenient than sending a few pictures at a time in messages, however, there are still file size limits applied depending on the email client. For example, Gmail imposes a 25MB limit on attachments sent in a single email.
Regardless of these drawbacks, if you only need to send a handful of photos, this method is certainly a quick and easy one to use!
Summary (Messaging or Email):
✔ Quick and Easy
✔ Available with or without computer
✘ Attachment limits
✘ Potential unwanted image compression
Conclusion
As you can see, there are many different ways to transfer photos from iPhone to Android. We've handpicked the best ones for you in this guide, so you can choose the best method to meet your needs. For example...
- When switching from iPhone to a new Android device, check if the Android comes with an app which helps you migrate your photos and other content from old phone to new.
- For full control of your iPhone content, as well as intelligent photo exporting, use TouchCopy to transfer from iPhone to PC or Mac.
- If you don't have a computer, or would prefer not to store all your photos on the computer, upload your iPhone photos to a cloud solution like Google Photos. You can then access your photos on any device using your Google account.
If you still have queries, you may find your answers in our FAQs below.
Other FAQs about transferring photos from iPhone to Android
Can I transfer photos from iPhone to Android via Bluetooth?
No, you cannot transfer photos from iPhone to Android using Bluetooth.
Although both iPhone and Android can make use of Bluetooth technology, it is not possible to transfer files between the different operating systems via Bluetooth.
Is there a way to AirDrop to Android?
You can only use Apple's AirDrop feature with Apple iOS devices - not Android devices.
However, there's an app called AirDroid which allows you to wirelessly transfer files (including photos) between devices much like AirDrop does.
To use this service, get the AirDroid app on both your iPhone (from the App Store) and your Android phone (from the Google Play Store).
Why is my iPhone sending blurry pictures to Android?
This can be caused by compression of the original photos from the iPhone. Photos sent by message can be automatically compressed in order to meet file size limitations imposed by the provider. Alternatively, depending on settings, some cloud services may save photos you upload from iPhone in reduced quality/resolution to save space in your cloud storage.
Wide Angle Software