Why Backup Your Phone?
Mobile devices today contain lots of valuable information like contacts, messages, photos and calendars.
Making a backup of your phone is essential to keep your data safe in case your phone was damaged, misplaced or stolen. You may also wish to backup simply because you're getting a new phone, or if you have run out of storage on your device and you'd like to keep a copy of your files on your computer or in the Cloud.
We've done some investigation and testing to compile a list of the best 5 ways to backup an Android phone. Let's get started!
- Perform a smart backup to PC using Droid Transfer
- Backup to your Google Drive Cloud Storage
- Use your phone manufacturer's backup service
- Transfer Files using File Explorer (PC)
- Transfer Files using Android File Transfer (Mac)
- Which method is best? - Comparison table
Method 1: Perform a smart backup using Droid Transfer
For the most complete backup, we recommend using Droid Transfer software.
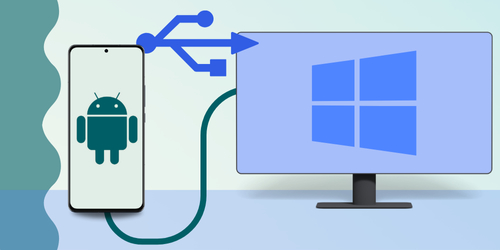
Droid Transfer allows you to view all your Android's content through your computer. You can then choose which types of data you wish to backup to your PC and how you wish to backup - either wirelessly or using a USB connection.
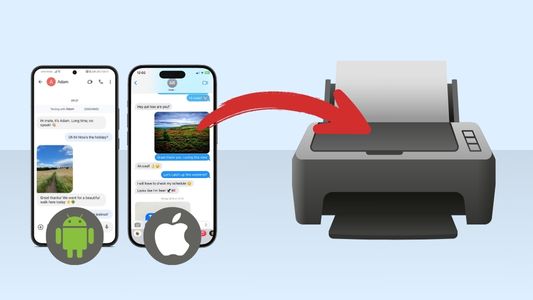
Any messages, photos, songs and other files backed-up by Droid Transfer will be accessible to you on your PC for you to view, copy or print.
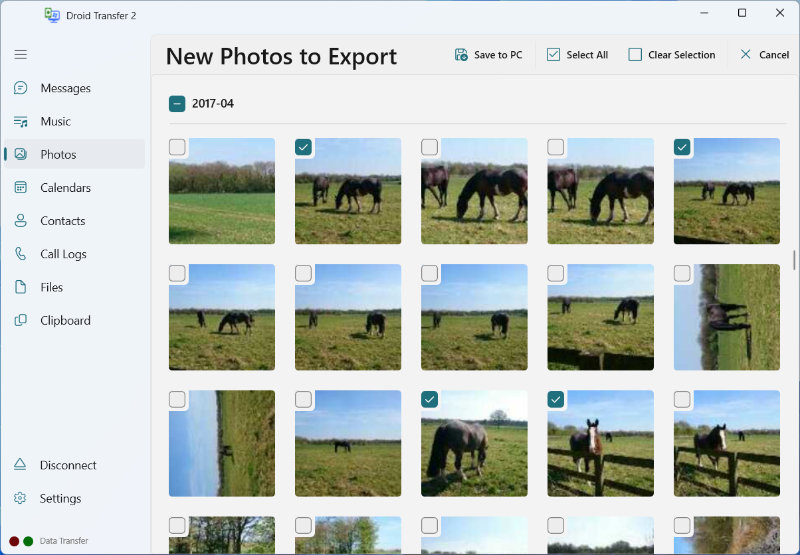
Let's see an example of how to make a backup of your Android phone photos:
- Download Droid Transfer and connect your Android device.
- Click "Photos" to view your Android phone photos through your PC.
- Click "Export New Photos" in Droid Transfer.
- Choose a folder on your PC that you'd like to backup your photos to.
- The folder is then scanned for existing photos, and will show you which of your Android phone photos are not already backed up to your folder.
- Click "Save to PC" to export all these photos to your chosen folder.
In a similar way, you can also compare your music libraries on your phone and PC and make a differential backup of your music.
Here is how to backup your music:
- Launch Droid Transfer and connect your Android device.
- Click "Music" to view your Android music.
- Click "Sync Folder".
- Select the folder on your PC that you'd like to backup your music to.
- Droid Transfer will scan your folder and let you know which music on your Android device is not present in your folder (and which music in your folder is not stored on your Android).
- Click "Copy tracks to PC" to backup your Android music to your chosen folder.
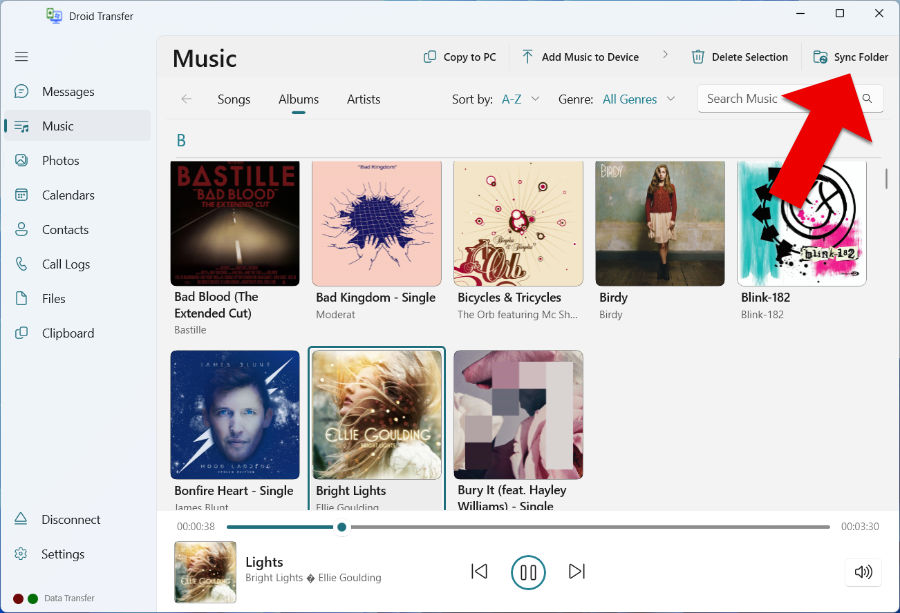
You can get even more control over exactly which songs are copied in this process by using the "Advanced Sync Mode".
Using these methods, you can easily make regular backups of your photos and music, without duplicating the files that you've already backed up.
What else can Droid Transfer do?
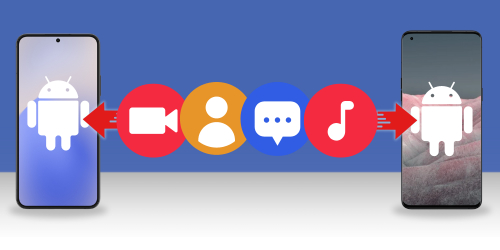
As you can see, you can backup and manage any media type you wish using Droid Transfer including:
Watch this: How to easily backup your Android phone to your PC:
Method 2: Backup to your Google Drive Cloud Storage
Since you're already logged in with your Google account on your phone, it is easy to backup the device using Google.
The route to access these backup settings may vary slightly depending on what device / version of Android you are using. However, here's the basics of what you are looking for:
- Launch Settings on your phone.
- Tap "System", then "Backup".
- Tap "Backup now" to create a new backup of your device to Google Drive.
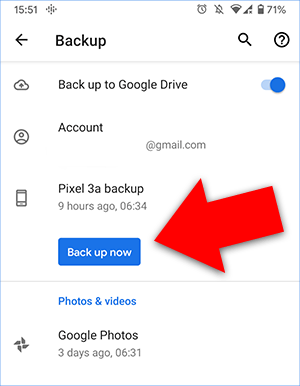
From this screen you can also manage what data is being backed up when you perform a backup, as well as when your last backup was made.
To see what gets backed up on Google Drive and how to restore your Android phone from backup, check out Google's guide.
Note that Google Drive does not backup your MMS and music, also free storage is limited, with the limit starting from 15 Gigabytes. Additionally, you can't get access to files contained in a Google backup unless you restore them to your device and your Google drive backup will expire if you don't use your device for 57 days. If this is an issue for you, you may wish to consider Droid Transfer software to ensure that you backup everything you need on your own computer.
Extra: Automatically backup photos and videos with Google
Google make it easy to keep your photos and videos backed up on the go with Google Photos syncing.
Here's how to turn on photo syncing:
- Open the Google Photos app on your Android.
- Tap the menu icon at the top of your screen.
- Select Settings, then "Backup & Sync".
- Tap to toggle "Backup & sync" on.
Note that syncing will only take place when you are connected to the internet.
Method 3: Use your phone manufacturer's backup service
Another reliable way to perform a full backup of your phone is to use your manufacturer's built-in service. Like creating a backup with Google, you won't be able to make use of files in the backup, it's purely for backup & restore purposes.
If you need full access to your backed up files, check out Method 1 >
Again, this method greatly depends on the manufacturer of your phone and what version of Android you are using. Regardless, the steps to find such a feature should be very similar.
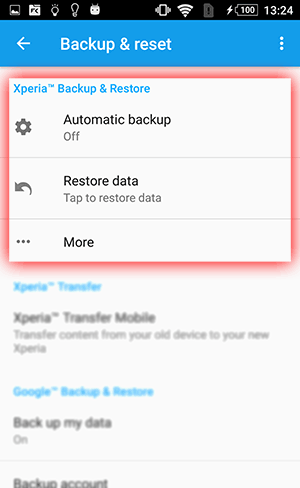
Let's take a look at how to make a backup on a Sony Xperia device...
- Open Settings on your phone.
- Tap "Backup & Reset".
- Choose a type of backup:
- Auto backup: Tap "Automatic backup", then toggle this backup ON.
- Manual backup: Tap "More...", then "Manual backup", then tap "Backup".
Method 4: Transfer Files using File Explorer (Windows only)
If you're looking to quickly backup a few files for free, you can do it straight from Windows.
Unfortunately, this method will only work to access and copy music, photos and videos from the Android phone. If you need to backup your messages, contacts and other data, we recommend using Droid Transfer.
Here's how to copy Android content to your PC using File Explorer...
- Connect your Android with your PC using your USB cable.
- Open File Explorer on your PC.
- If you receive a pop-up on your Android, choose "Transfer Files" or similar. If you don't receive the pop-up and your Android doesn't appear in File Explorer, swipe down on your Android and tap "Charging with USB" or similar. This will present the option to select "Transfer Files".

- Select your Android in File Explorer.

- From here you can copy and paste, or drag-and-drop your files from Android to your PC.

Method 5: Transfer Files using Android File Transfer (Mac only)
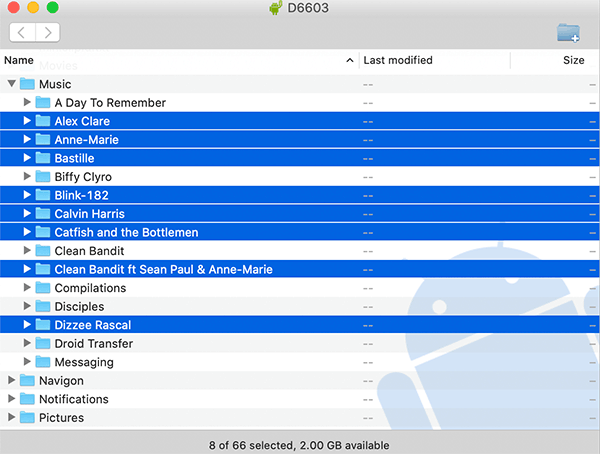
If you are using a Mac, rather than a Windows PC, you won't be able to natively transfer files from Android.
As such, you'll need to download and install the free Android File Transfer program.
You'll then be able to connect your Android to Mac with your USB cable, run Android File Transfer and copy across your music, photos and videos from your folders. You can also drag and drop files from your Android device to your Mac. The app will open automatically next time you connect your Android device to your Mac, making this a very convenient solution.
Which method is best? - Comparison table
So now you've seen how to perform the best 5 Android backup methods. But which is best?
There's no definitive answer to this question, as your requirements will differ from the next person.
However, we can compare the different features of each method to help you pick the best one for you. In fact, that's exactly what we've done:
| Features | Droid Transfer | Manufacturer | File Explorer | Android File Transfer | |
|---|---|---|---|---|---|
| Backup chosen files in a useable and accessible format | ✔ | ✘ | ✘ | ✔ | ✔ |
| Backup & Restore | ✘ | ✔ | ✔ | ✘ | ✘ |
Connection |
|||||
| Wi-Fi / USB cable | Wi-Fi or USB | Wi-Fi | Wi-Fi | USB | USB |
What is backed up? |
|||||
| Music | ✔ | ✘ | Varies1 | ✔ | ✔ |
| Photos | ✔ | ✔2 | Varies1 | ✔ | ✔ |
| Video | ✔ | ✔2 | Varies1 | ✔ | ✔ |
| SMS Messages | ✔ | ✔ | Varies1 | ✘ | ✘ |
| MMS Messages | ✔ | ✘ | Varies1 | ✘ | ✘ |
| Contacts | ✔ | ✔ | Varies1 | ✘ | ✘ |
| Calendars | ✔ | ✔ | Varies1 | ✘ | ✘ |
| Call Logs | ✔ | ✔ | Varies1 | ✘ | ✘ |
| Device and app settings3 | ✘ | ✔ | Varies1 | ✘ | ✘ |
Extra |
|||||
| Export or Print messages | ✔ | ✘ | ✘ | ✘ | ✘ |
| Sync music with PC or iTunes | ✔ | ✘ | ✘ | ✘ | ✘ |
1 depends on the specific manufacturer’s backup solution
2 ability provided with Google Photos
3 settings saved for apps depend on each individual app
Takeaways
So, there you have it! The top 5 ways to backup your Android phone.
We hope that you now have enough information to make a choice as to which method will be best for your needs.
All things considered, we recommend using Droid Transfer to ensure that all your files are backed up, and for the most control over what you are backing up. Google is great for automatic/regular backups. Or for quickly transferring a few photos or songs, use File Explorer!
 Publisher:
Wide Angle Software


