Droid Transfer on PC works with the Transfer Companion app on Android to make a connection. Once the two devices are connected, you can access all your Android content right from your PC!
You can then effortlessly print important messages, export call history, save precious photos, move your favorite songs onto your Android device and loads more.
Quick jump to any section in the guide...
Download and Install
First of all, you'll need both components of the software.
Use the buttons below to get Droid Transfer 2 on your Windows PC or laptop, and the Transfer Companion app on your Android device.
Legacy versions:
Find out how to get set up with the legacy Droid Transfer 1 and Transfer Companion 4 >
How to connect via Wi-Fi
- Make sure your PC and your Phone are connected to the same Wi-Fi network.
- Launch Droid Transfer on your PC.
- Once Droid Transfer finds your local network - the connect window will show a QR code.
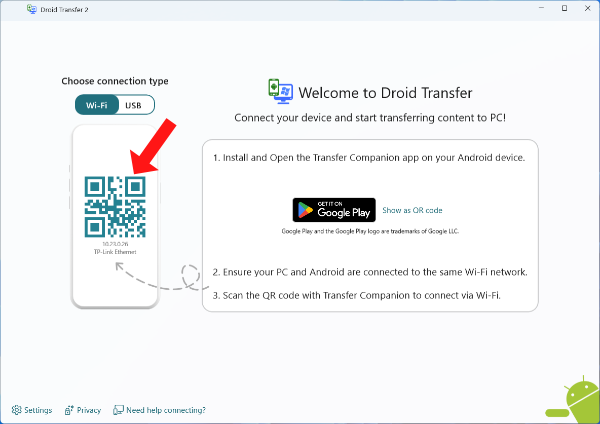
- Open the Transfer Companion app on your Android Device and tap "Scan Droid Transfer QR Code".
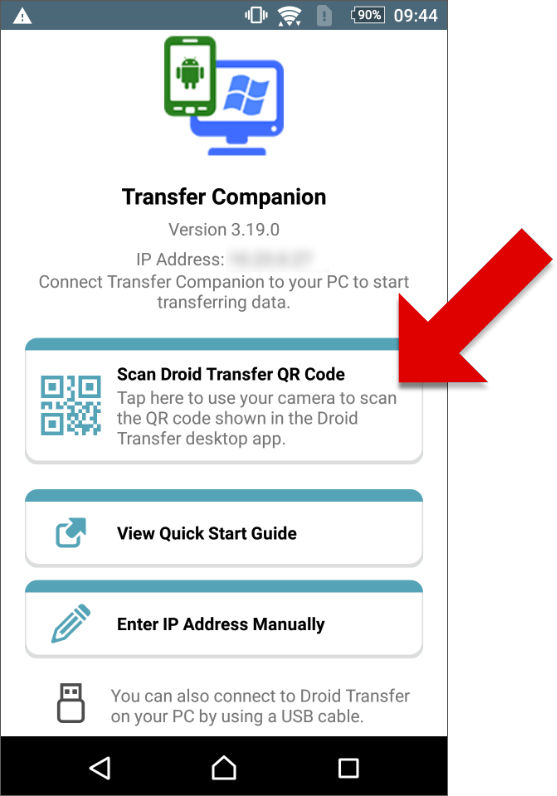
- Use the QR scanner to scan the QR code shown in Droid Transfer running on your PC.
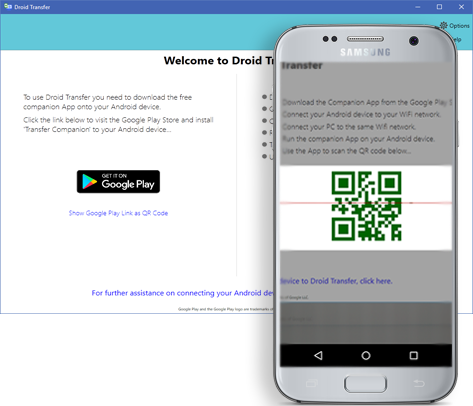
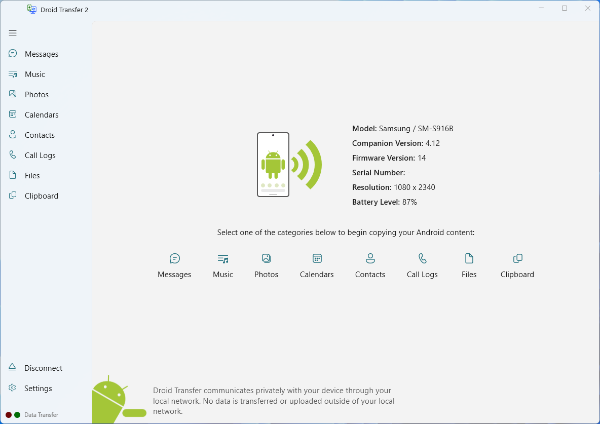
You're connected! A connection between your phone and your PC has been established and you can start copying content using Droid Transfer on your PC.
Struggling to make a connection via Wi-Fi?
Check out our tips for troubleshooting a failed Wi-Fi connection! Failing that, consider following the steps below to connect via USB cable.
How to connect using a USB cable
To make a USB cable connection with Droid Transfer, you'll need to change some settings on your Android device.
Tip: These steps can vary slightly, based on the device you have.
Step 1: Enabling Developer Options on your phone
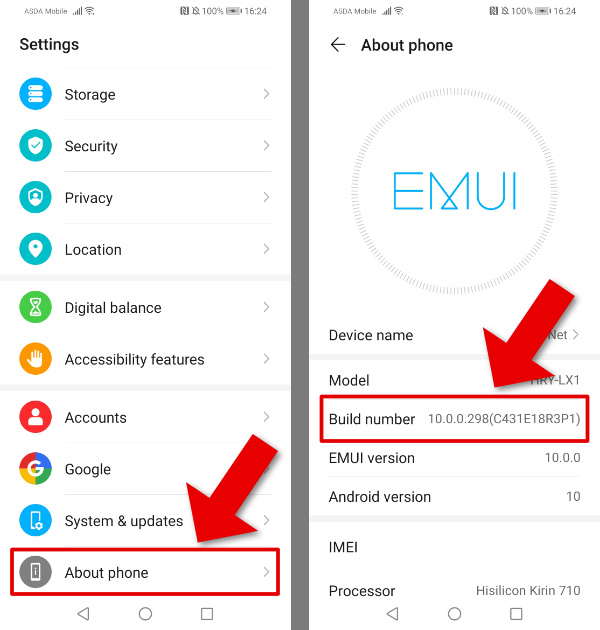
- Open your device settings and tap "About phone".
- Look for the entry "Build Number". Depending on your device, this option may be inside a "Software Information" sub-menu.
- Tap the "Build Number" entry up to seven times (No, really!). Your device will show you how many taps are required to enable Developer Mode.
- Go back to your main Settings menu - scroll down to the bottom, you should now see a new entry called "Developer Options".
 Congratulations! You're now a developer! ;)
Step 2: Enable USB Debugging
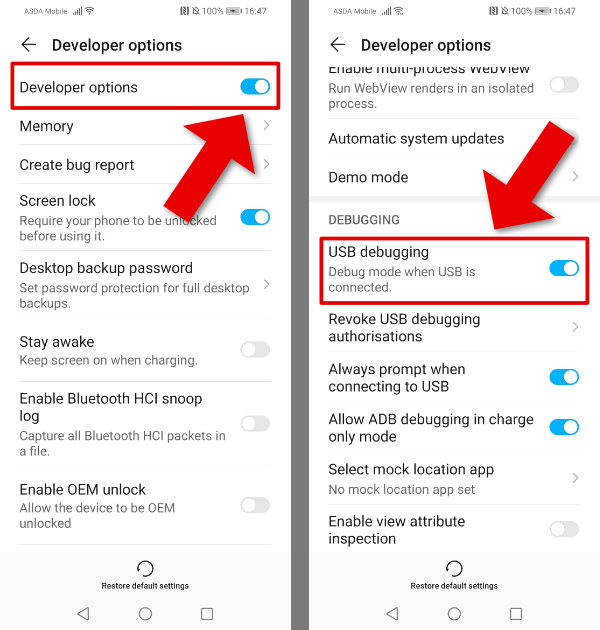
- In your Android device Settings, tap "Developer Options".
- Ensure "Developer Options" is ON.
- Scroll down to "USB Debugging" and make sure that is enabled also. If it isn't, slide the toggle switch to the right to enable it.
USB Debugging greyed out? If you're using a Samsung device, you may have to disable "Auto Blocker" to continue.
Click here for instructions on how to disable Samsung Auto Blocker.How to Disable Samsung Auto Blocker
Some Samsung devices have a feature called "Auto Blocker", which can prevent USB Debugging from being enabled. To disable Auto Blocker, follow these steps:
- Open the Settings app on your Samsung device.
- Scroll down and tap on "Security and Privacy" or "Biometrics and Security".
- Scroll down to "Additional Security Settings".
- Tap on "Auto Blocker" to disable it.
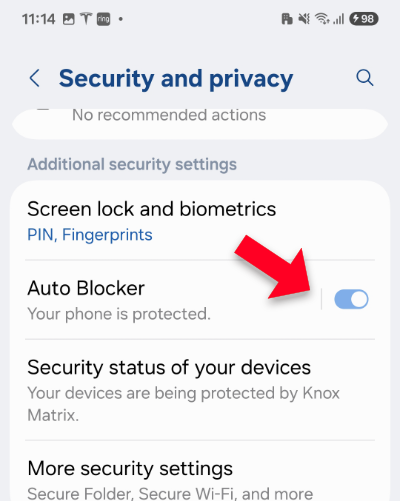
Tip: If you cannot find the Auto Blocker setting, you can search for it in the settings search bar.
Once Auto Blocker is disabled, you should be able to enable USB Debugging as described above.
- A prompt may appear on your Android asking to enable USB Debugging. Tap "OK" or "Allow" to confirm.
Step 3: Run Droid Transfer on your PC
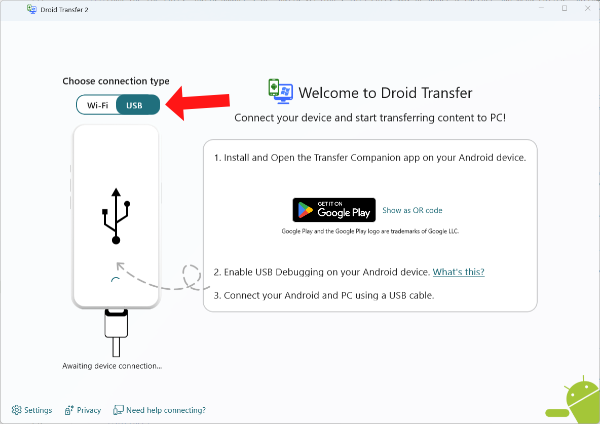
- Launch Droid Transfer on your PC.
- Click the toggle to switch to USB connection mode:
- Connect your Android device to your PC with a USB cable which is capable of file transfers (some cables are for charging-only).
- If prompted to trust the PC, tap "OK" or "Allow" on your phone.
- Swipe down from the top of your device, tap "Charging this device via USB", then select "File Transfer" as the connection type.
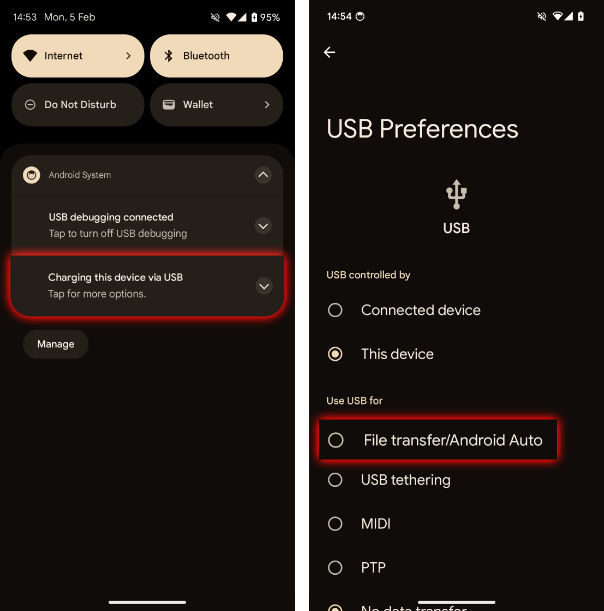
- When Droid Transfer detects your device, it will launch Transfer Companion and start loading your phone's data via the USB cable.
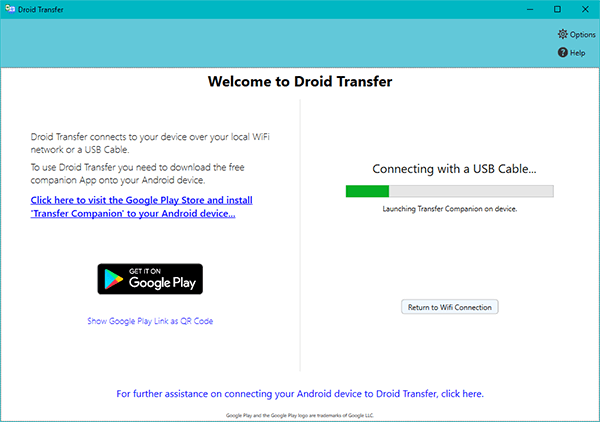
- Connection established! You can now start managing your Android device content via Droid Transfer.

Struggling to make a connection via USB?
If you've been unable to make a USB connection, try connecting via Wi-Fi instead. Failing that, check out our tips for troubleshooting a failed USB connection!
Video guide: Getting started with Droid Transfer
To quickly get an idea about what Droid Transfer can do, and how to get started, watch our video!
I am connected... what next?
You can now start exploring your Android content with Droid Transfer!
Simply select a feature like Messages, Call Logs, Photos, etc. to view the content on your Android device.
Each section offers different abilities which will empower you to save content to your PC, export content in different formats, sync content with your PC and more.
For step-by-step walkthroughs on how to use each feature in Droid Transfer, check out our user guide!
Troubleshooting Connection Issues
If you have trouble making a connection with Droid Transfer, follow the steps in our guides below:
Need more help? - Contact our support team who will be happy to help.


