
How to Create a New Encrypted Backup in TouchCopy, iTunes, Apple Devices or Finder

Your iPhone backup holds essential information- Messages, Contacts, Calendars, and more. Protecting this sensitive data is crucial, and the key is Backup Encryption. With an encrypted backup, your data stays securely encoded behind a password.
You can make an encrypted backup of your iPhone using one of the four methods covered in this guide:
- TouchCopy (recommended - Windows/Mac)
- Apple Devices app (Windows-only)
- iTunes (Windows/older Mac)
- Finder (Mac-only)
How to Create an Encrypted iPhone Backup with TouchCopy
TouchCopy offers the most flexibility and control over your device data and backups. You can choose from different types of backups including a full backup that you can restore, or a reduced backup that saves space on your computer. TouchCopy doesn't compromise on security, either, so you can easily encrypt your backups to keep them safe.
Additionally, unlike other methods in this guide, you can actually access the contents of your backups with TouchCopy, and save files to your computer.


Follow the steps below to create an encrypted backup with TouchCopy:
- Launch TouchCopy on your PC or Mac.
- Connect your iPhone using a USB cable or Wi-Fi.
- Click the "Messages" section in TouchCopy (or any section except Music, Photos and Files - these sections don't require a backup).
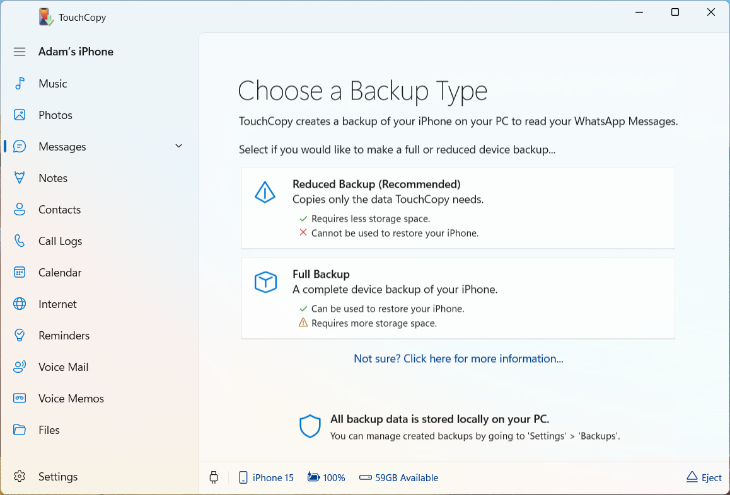
- Choose to create a Reduced or Full backup.
- Then, toggle Backup Encryption On and set a password.
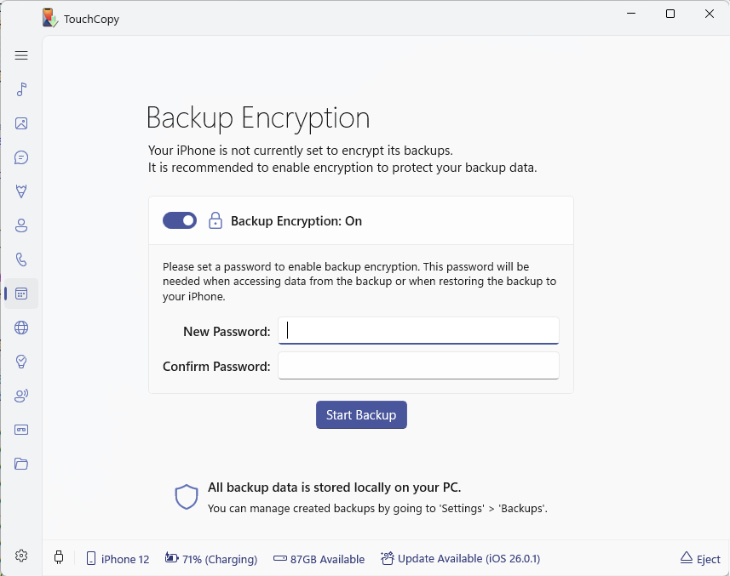
- Click "Start Backup"
Tip: If you've previously enabled encrypted backups (in TouchCopy, iTunes, Apple Devices or Finder), TouchCopy will detect this and encrypt your new backup automatically. It will use the same encryption password you originally set.
How to create an encrypted iPhone backup using Apple Devices
- Launch the Apple Devices app on your PC.
- Connect your iPhone using your USB cable.
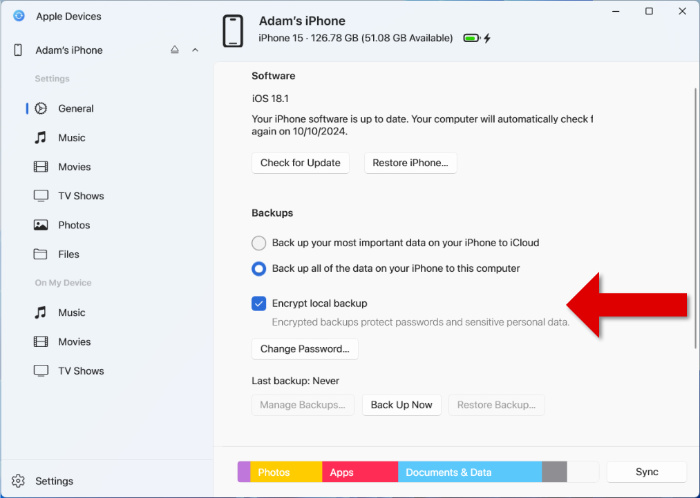
- Select "Backup all of the data on your iPhone to this computer".
- Enable "Encrypt local backup".
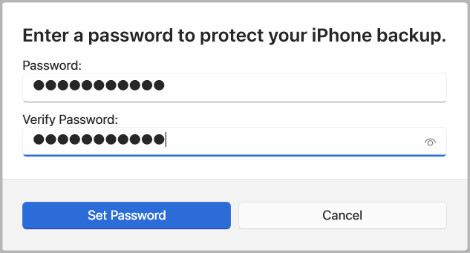
- Enter a password to protect your iPhone backup. Verify your password by entering it again, and then click "Set Password".
- Enter your passcode on your iPhone if prompted.
- Apple Devices will then automatically begin to back up your device.
Did you know? Encryption is required to back up sensitive data like Passwords, Health data, Wi-Fi settings, website history and Call History.
How to create an encrypted iPhone backup in iTunes
- Launch iTunes on your computer.
- Connect your iPhone using your USB cable.
- Click your device icon.

- Ensure that "This Computer" is checked.
- Tick the "Encrypt local backup" checkbox.

- Create your iTunes backup password to protect your iPhone backup. Enter a secure password that you will remember, then verify it in the second box.

Did you know? If you have previously created an encrypted backup on your computer, the "Encrypt local backup" option will already be checked. In this case, you can simply click "Back Up Now" to create a new encrypted backup using your existing password.
How to create an encrypted iPhone backup in Finder on Mac
- Launch Finder on your Mac.
- Connect your iPhone using your USB cable.
- Select your device from the list of Locations.
- Choose "Back up all the data on your iPhone to this Mac".
- Choose "Encrypt local backup". You may need to create a password if this option was not already checked.
- Click "Back Up Now" if the backup does not start automatically.
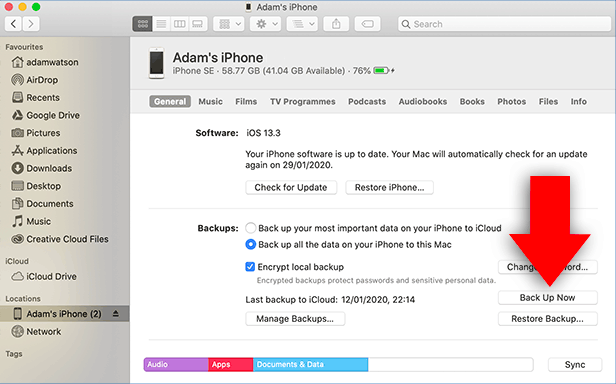
Managing your Backup Encryption Password
Keep your backup encryption password safe. Without it, you'll be unable to access, modify, or decrypt your backup.
If you want to change your password for a backup in Apple Devices, iTunes or Finder, click "Change Password..." before backing up. Here, you'll need to enter your existing password, and then create a new password for any new backups you make.
Forgot your password? Check out our guide on resetting a backup encryption password on your iPhone.
How to access the contents of your encrypted backups
Backups keep your device data safe and can be restored if something happens to your device. However, you can't normally browse through a backup on your computer to pull out favorite photos or print important messages — at least, not without the right tools.
TouchCopy
As seen in this guide, TouchCopy lets you access the content of your backups directly.
You can browse and export messages, call history, contacts and more, to your computer in convenient formats - giving you more control than the standard Apple backup methods. TouchCopy can also copy data which isn't included in a device backup, like music and playlists, straight from your connected device,
iBackup Extractor
If you no longer have your iPhone, iPad or iPod but still want to access the data stored in your backups, iBackup Extractor is the ideal solution.
With iBackup Extractor, you can browse the backups stored on your computer and export data in human-readable formats for safekeeping or sharing. Unlike TouchCopy, iBackup Extractor can only access data that exists in your backups — it can't copy content directly from the device, such as music.
For more information, check out our guide on how to recover iPhone Call History using iBackup Extractor.

Popular FAQs
- What's the Difference Between Backup Types in TouchCopy?
- How to Change Where Device Backups are Made to and Read from in TouchCopy
- How to Backup iPhone to External Hard Drive
- TouchCopy is Stuck while Creating a Backup of my Device
- How to Recover from a Backup Failed Error Message
- Using TouchCopy with Encrypted Device Backups
- Forgot Your iPhone Backup Password? Here's How to Reset It
- How to Remove iPhone Backups in iTunes, Finder and iCloud
- How to Update iOS on iPhone or iPad