Droid Transfer offers a quick way to transfer your files, photos and other media between your Android phone and your PC. You can connect over your local Wi-Fi network, or opt for a direct connection using a USB cable for enhanced speed and stability.
To get started with a USB connection, you'll need to adjust some settings on your Android device to allow communication between Droid Transfer and the Transfer Companion app. This support article walks you through the steps — or, if you prefer a visual guide, check out our step-by-step video tutorial below!
You need to change some settings on your Android device so that "Developer Mode" is enabled.
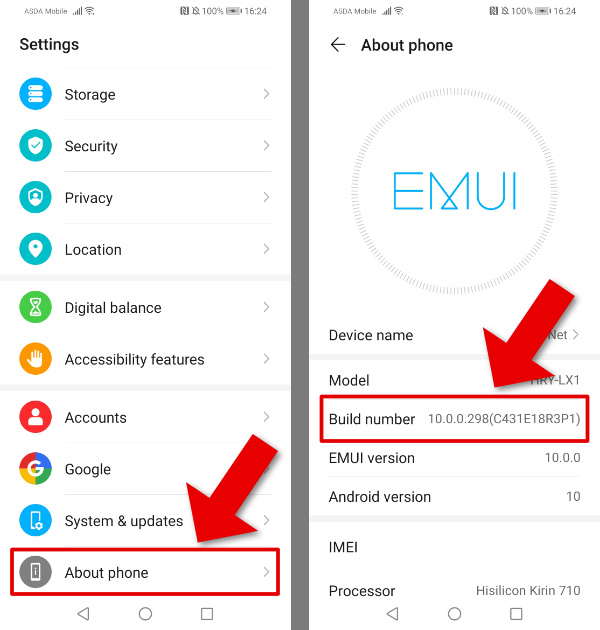

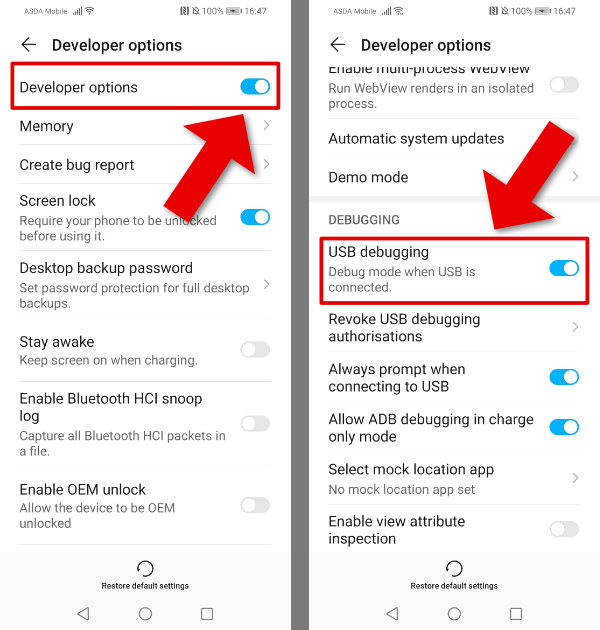
Just a couple more settings to change...
Alternatively, you can connect your Samsung device to Droid Transfer over a WiFi network.
Some Samsung devices have a feature called 'Auto Blocker' which can prevent USB Debugging from being enabled. To disable Auto Blocker, follow these steps:
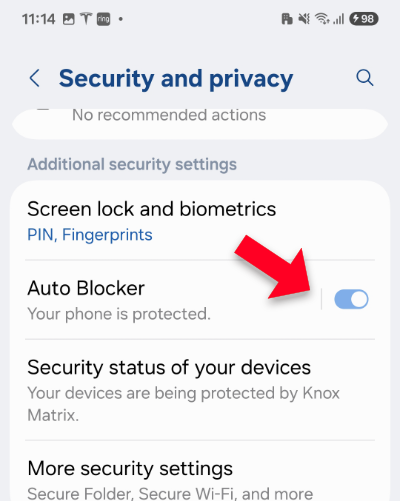
Tip:If you cannot find the Auto Blocker setting, you can search for it in the settings search bar.
Once Auto Blocker is disabled, you should be able to enable USB Debugging as described below.
Download Transfer Companion to your Android device from the Google Play Store. You need to be running at least version 5.02 of Transfer Companion - so check for updates if you have previously downloaded Transfer Companion to your Android device.

On your Windows PC, go to this address to download Droid Transfer...
Run Droid Transfer on your PC and when you see the connect screen:
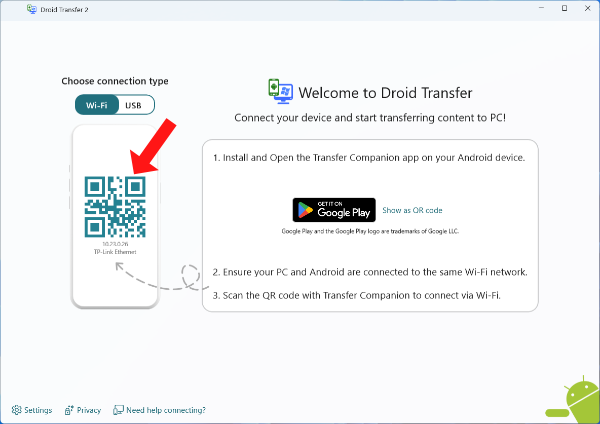
Click the toggle button to switch over to USB connection mode:
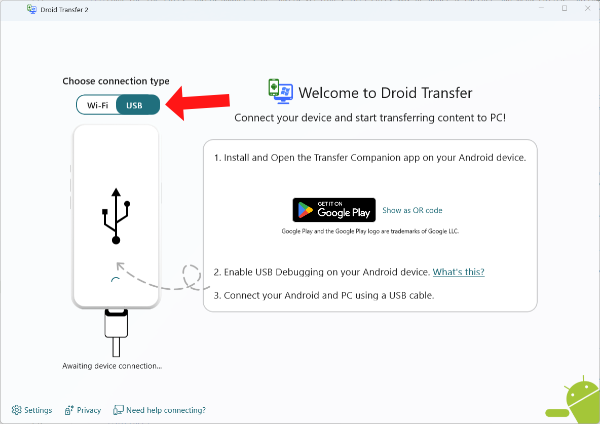
Connect your Android device to your PC with a USB cable. Depending on your device, your phone may request permission for it to communicate with your PC.
Click OK or Allow on any prompts showing on your Android Device.
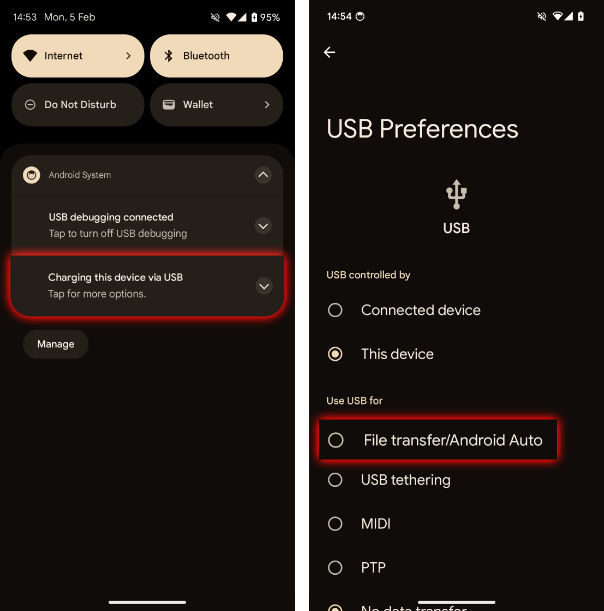
Check that your device is set to allow file transfer using your USB connection. To do this, on your device, swipe down from the top of the screen and tap "Charging this device via USB". Under "Use USB for" select "File Transfer".
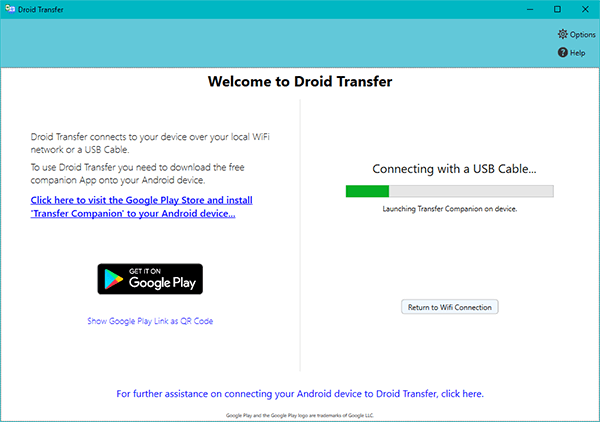
When Droid Transfer detects your device, it will launch Transfer Companion on your Android device and begin to load your phones data through the USB cable.
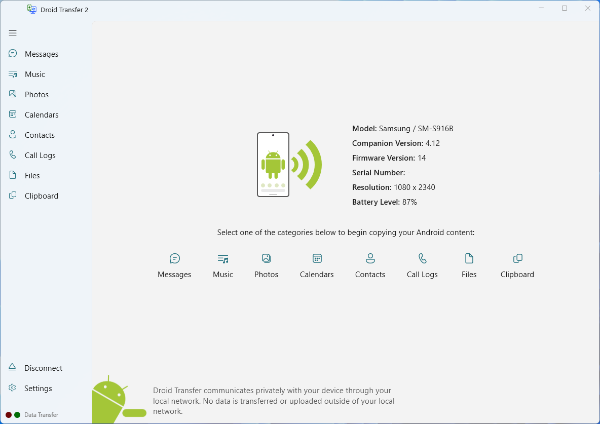
Connection should now made between Droid Transfer and Transfer Companion and you can start managing and copying your Android Phone content using Droid Transfer on your PC.
If you're having troubles, check out our USB connection troubleshooting tips which will help you resolve any issues.

 Droid Transfer 2
Transfer and manage your Android device media from your Windows PC.
Learn more Download